Authenticate users using Email/Password combination with Supabase in NextJS!

Hey There fellow human!

In this post, You will learn how to build Email/Pass authentication using Supabase in NextJS!
What we are building today:
- Sign In/Sign Up
- Logout
Let's get started!
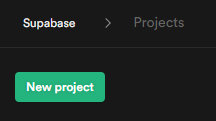
First, you will need to create a new project in supabase
Click on the New Project button to create a new project, choose a name, and you're good to go!
Set up a new NextJS Project
Then, you need to set up a Next.js app, I'm also using tailwind as my preferred UI library, you can use whatever you want.
npx create-next-app -e with-tailwindcss supabase-auth
Now, let's move to that folder and install the only required dependency, supabase-js
cd supabase-auth
# for npm
npm i @supabase/supabase-js

# for yarn
yarn add @supabase/supabase-js
Now in the index.js file, remove the boilerplate
- pages/index.js

const Home = () => {
  return <div>hello world</div>;
}

export default Home;
Now, let's initialize supabase client
For this, we will create a new file named supabase.config.js at the root of the project and initialize the client like this:
Replace the keys with the actual keys that you copied in the first step.
- supabase.config.js

import { createClient } from "@supabase/supabase-js";

// Create a single supabase client for interacting with your database
const supabase = createClient(
  "<your_project_url>",
  "<your_public_anon_key>"
);

export default supabase;
Now, we are gonna make a header for navigation across pages and we will setup a Logout button in the header itself
Create a new page named Header.js inside the components directory at the root of your project:
- components/Header.js

const Header = () => {
  return (
    <header className="bg-gray-900 px-8 py-6 flex flex-row items-center">
      <a
        href="/"
        className="mx-2 text-xl px-4 py-1 rounded-full bg-emerald-500 text-white hover:bg-emerald-400 duration-100"
      >
        Home
      </a>
      <a
        href="/sign-up"
        className="mx-2 text-xl px-4 py-1 rounded-full bg-emerald-500 text-white hover:bg-emerald-400 duration-100"
      >
        Sign Up
      </a>
      <a
        href="/sign-in"
        className="mx-2 text-xl px-4 py-1 rounded-full bg-emerald-500 text-white hover:bg-emerald-400 duration-100"
      >
        Sign In
      </a>
    </header>
  );
};

export default Header
Now, we will import the Header component in the index.js file:
- pages/index.js

import Header from "../components/Header";

const Home = () => {
  return (
    <>
      <Header />
    </>
  );
};

export default Home;
Now, you should have a header like this:

Now, the auth part:
First, We are going to make a sign-up page
It will contain a form to fill in details and create a new account.
- pages/sign-up.js

import Header from "../components/Header";

const SignUp = () => {
  return (
    <>
      <Header />

      <div className="min-h-screen min-w-screen bg-gray-700 flex justify-center items-center">
        <form className="px-10 py-8 rounded-sm bg-white shadow flex flex-col gap-4">
          <input
            type="text"
            placeholder="Enter your email..."
            className="w-64 px-2 py-2 bg-slate-50 rounded outline-none font-medium text-gray-700"
          />
          <input
            type="password"
            placeholder="Enter a pasword..."
            className="w-64 px-2 py-2 bg-slate-50 rounded outline-none font-medium text-gray-700"
          />

          <button className="px-4 py-2 rounded-sm bg-emerald-500 text-white hover:bg-emerald-400 duration-100">
            Sign Up
          </button>
        </form>
      </div>
    </>
  );
};

export default SignUp;
Now, we are going to create variables to store values.
First, let's import the useState hook
import { useState } from "react";
Now, let's make two new variables
const [mail, setMail] = useState("");
const [pass, setPass] = useState("");
Now, let's assign the values to the form and assign a function to handle submit.
<form
          className="px-10 py-8 rounded-sm bg-white shadow flex flex-col gap-4"
          onSubmit={e => e.preventDefault()}
        >
          <input
            type="text"
            placeholder="Enter your email..."
            className="w-64 px-2 py-2 bg-slate-50 rounded outline-none font-medium text-gray-700"
            value={mail}
            onChange={e => setMail(e.target.value)}
          />
          <input
            type="password"
            placeholder="Enter a pasword..."
            className="w-64 px-2 py-2 bg-slate-50 rounded outline-none font-medium text-gray-700"
            value={pass}
            onChange={e => setPass(e.target.value)}
          />

          <button
            className="px-4 py-2 rounded-sm bg-emerald-500 text-white hover:bg-emerald-400 duration-100"
            onClick={signUp}
          >
            Sign Up
          </button>
        </form>
Now, we are going to make the actual function to create a new account with the details.
First, import the supabase client from supabase.config.js
import supabase from "../supabase.config";
Now, make a function named signUp inside the SignUp component.
const signUp = async () => {
  const { user, session, error } = await supabase.auth.signUp({
    email: mail,
    password: pass,
  });

  error ? console.log(error) : console.log(user);
  };
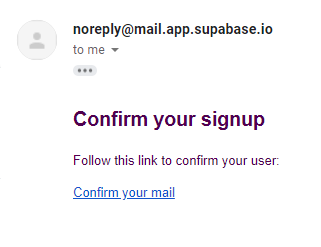
Now, at this point, if you sign up with the details, you should receive an email telling you to confirm your email. The user needs to confirm his/her email in order to verify it.
Now, let's make the sign in page.
Create a new file in the pages directory named sign-in.
First, we are gonna make a form that will collect data.
- pages/sign-in.js

import Header from "../components/Header";
import { useState } from "react";

const SignIn = () => {
  const [mail, setMail] = useState("");
  const [pass, setPass] = useState("");

  return (
    <>
      <Header />

      <div className="min-h-screen min-w-screen bg-gray-700 flex justify-center items-center">
        <form
          className="px-10 py-8 rounded-sm bg-white shadow flex flex-col gap-4"
          onSubmit={e => e.preventDefault()}
        >
          <input
            type="text"
            placeholder="Enter your email..."
            className="w-64 px-2 py-2 bg-slate-50 rounded outline-none font-medium text-gray-700"
            value={mail}
            onChange={e => setMail(e.target.value)}
          />
          <input
            type="password"
            placeholder="Enter a pasword..."
            className="w-64 px-2 py-2 bg-slate-50 rounded outline-none font-medium text-gray-700"
            value={pass}
            onChange={e => setPass(e.target.value)}
          />

          <button
            className="px-4 py-2 rounded-sm bg-emerald-500 text-white hover:bg-emerald-400 duration-100"
            onClick={signIn}
          >
            Sign In
          </button>
        </form>
      </div>
    </>
  );
};

export default SignIn;
Now, we are gonna make the function to sign the user in.
First, import supabase client from the supabase.config.js file:
import supabase from "../supabase.config";
Now, create a function named signIn
const signIn = async () => {
  const { user, session, error } = await supabase.auth.signIn({
    email: mail,
    password: pass,
  });

  error ? console.log(error) : console.log(user);
  };
Now, we will apply some logic.
If the user is signed in, the app should redirect him/her to the home page.
For this, we will use the useRouter hook.
In the sign-in.js page, import the useRouter hook
import { useRouter } from "next/router";
Now, inside the SignIn component, we are going to check if user has logged in or not and will redirect according to it.
- pages/sign-in.js

const router = useRouter();
const user = supabase.auth.user();
user ? router.push("/") : null;
Logout functionality So, as mentioned above, we will make the log-out function in the header section itself
First, import the supabase client in the Header.js file
import supabase from '../supabase.config'
Now, in the LogOut button, we will add an onClick event to handle logout. Here's how we are gonna do it:
<button className="mx-2 text-xl px-4 py-1 rounded-full bg-emerald-500 text-white hover:bg-emerald-400 duration-100"
  onClick={()=>supabase.auth.signOut()}>
    Logout
</button>
Show results based on auth state.
So, we should display a text displaying whether the user is logged in or not. Here's how we are going to deal with this:
Let's import supabase client in index.js file
import supabase from "../supabase.config";
Now, add this code for the Home component:
const Home = () => {

  const user = supabase.auth.user()
  return (
    <>
      <Header />
    <p className="text-center text-2xl">
      {
        user ? "You are logged in!"
        : "You're not logged in :/"
      }
    </p>
    </>
  );
};
Well, that's it! Now you should have a fully-fledged Email/Pass auth built in!